THE PROCESS

Step 1 - Sourcing Leis: In Hawaii, you can find many places to find fresh handmade lei and haku, from shops in Honolulu Chinatown to the studios of makers across Oahu and beyond (pictured is a refrigerator at a local lei stand).

Step 2 - Photographing the Leis: I take LOT of pictures of each creation and then choose, crop, alter, and enhance the photos until I have a single idea to work from. Sometimes I feel like I’m cheating when I work from a picture (vs. the actual lei po’o), but the work takes weeks and (unfortunately) the leis don’t last forever.
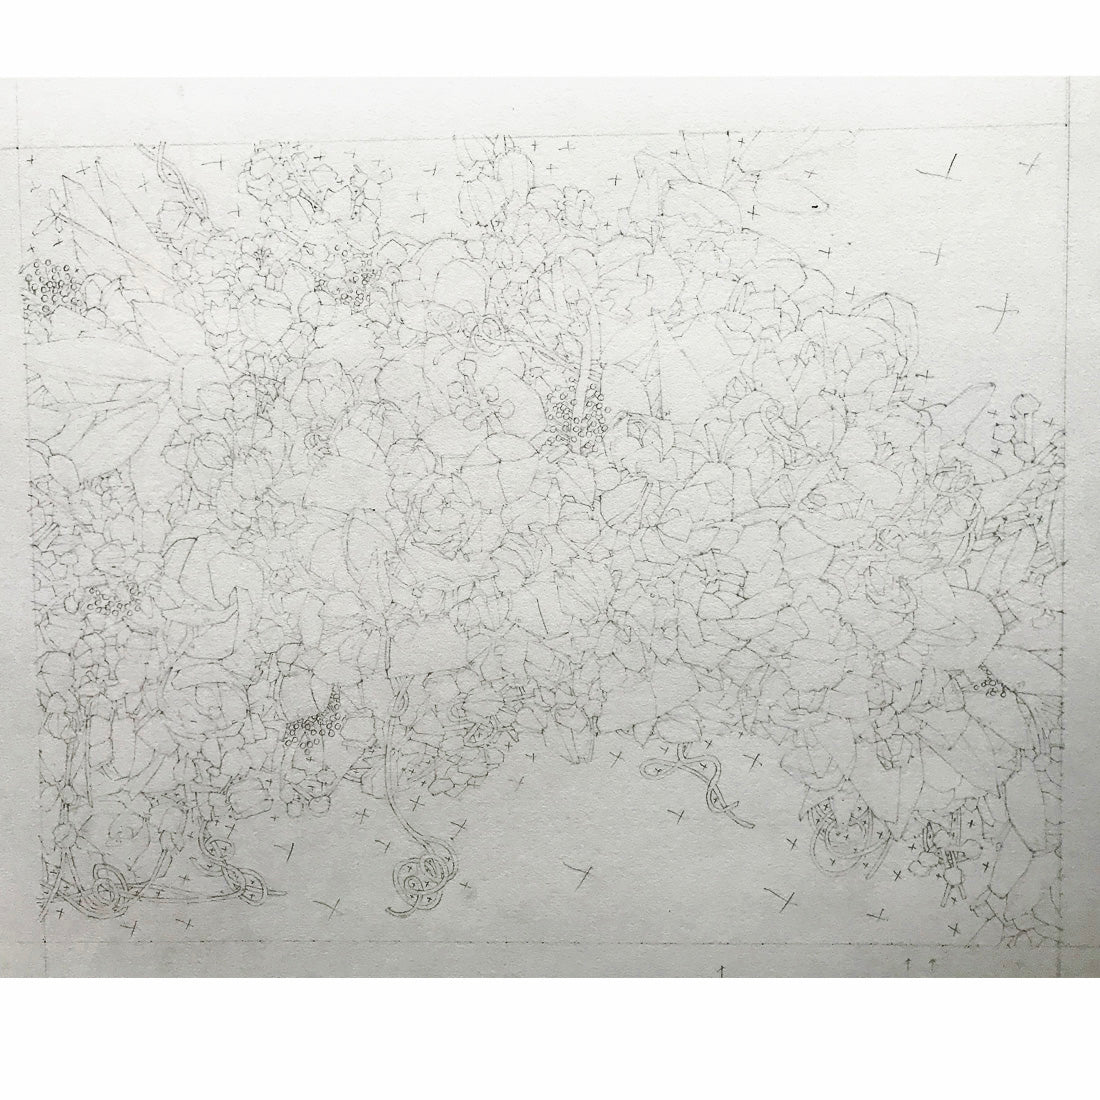
Step 3 - Basic Pencil Drawing: This is the first point where I’m starting the actual design on paper. I use heavyweight Bristol Board and a everyone’s favorite pencil from standardized tests, the infamous Number 2 (and a lot of erasers). Pictured is the initial drawing for “Haku with Shell Ginger.”
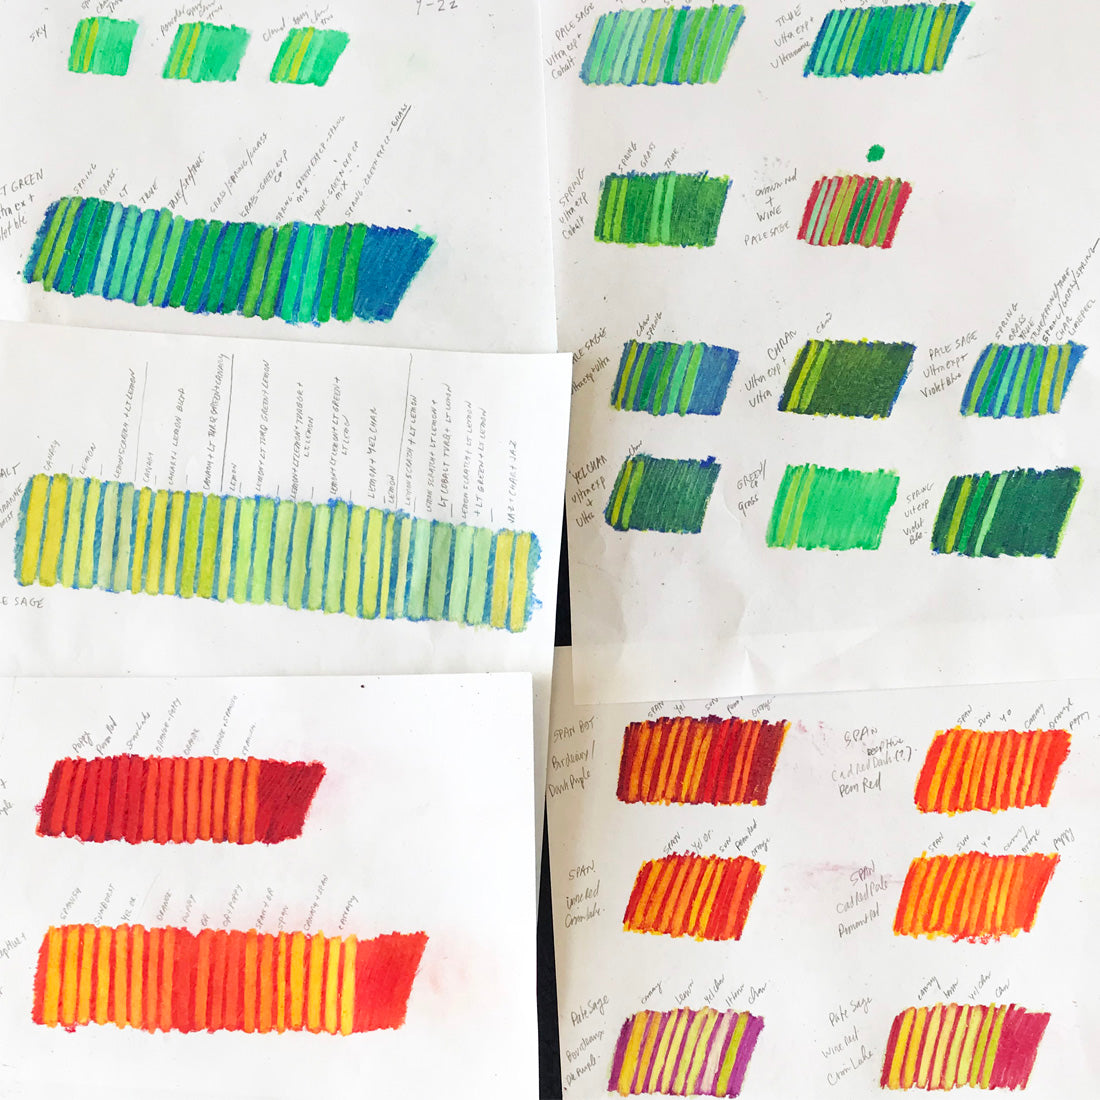
Step 4 - Planning the color scheme: A wide range of colors can be found in most haku, and you have to make sure they all work well together. Here is where I start planning the colored pencil work. I make test templates for the colors (and choose a base color for underneath) to decide the hues that will go in the final drawing. Shown is some of the planning for “Lantana with Orchids.”
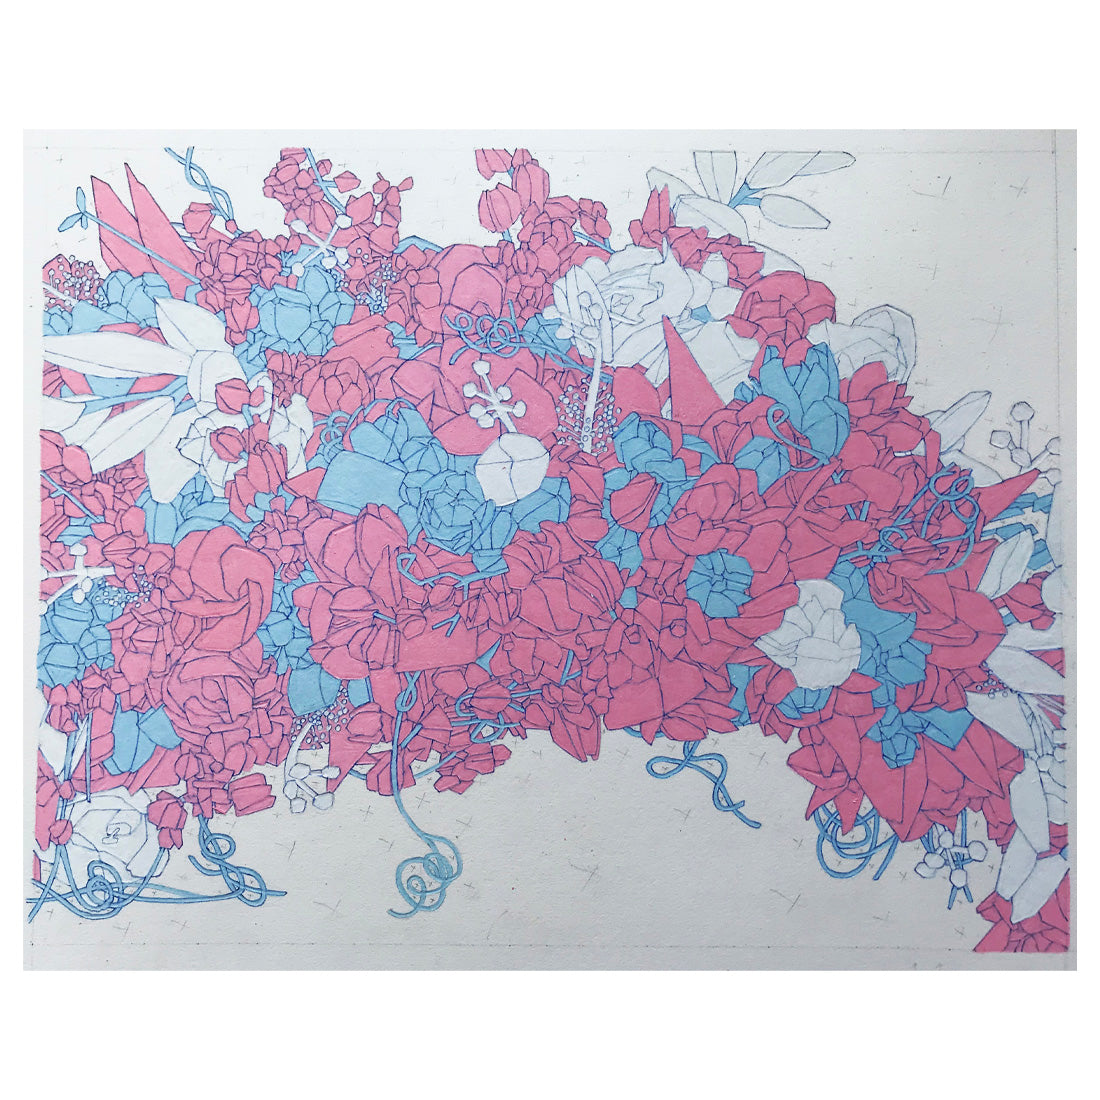
Step 5 - Laying down a bottom layer: This can involve setting down up to 5-7 different base colors. I find that layering color gives more dimension to the design. At this point I have to decide exactly where each color range is going to be located before moving on to the final stage of the drawing. Pictured is the base layer for “Haku with Shell Ginger.”
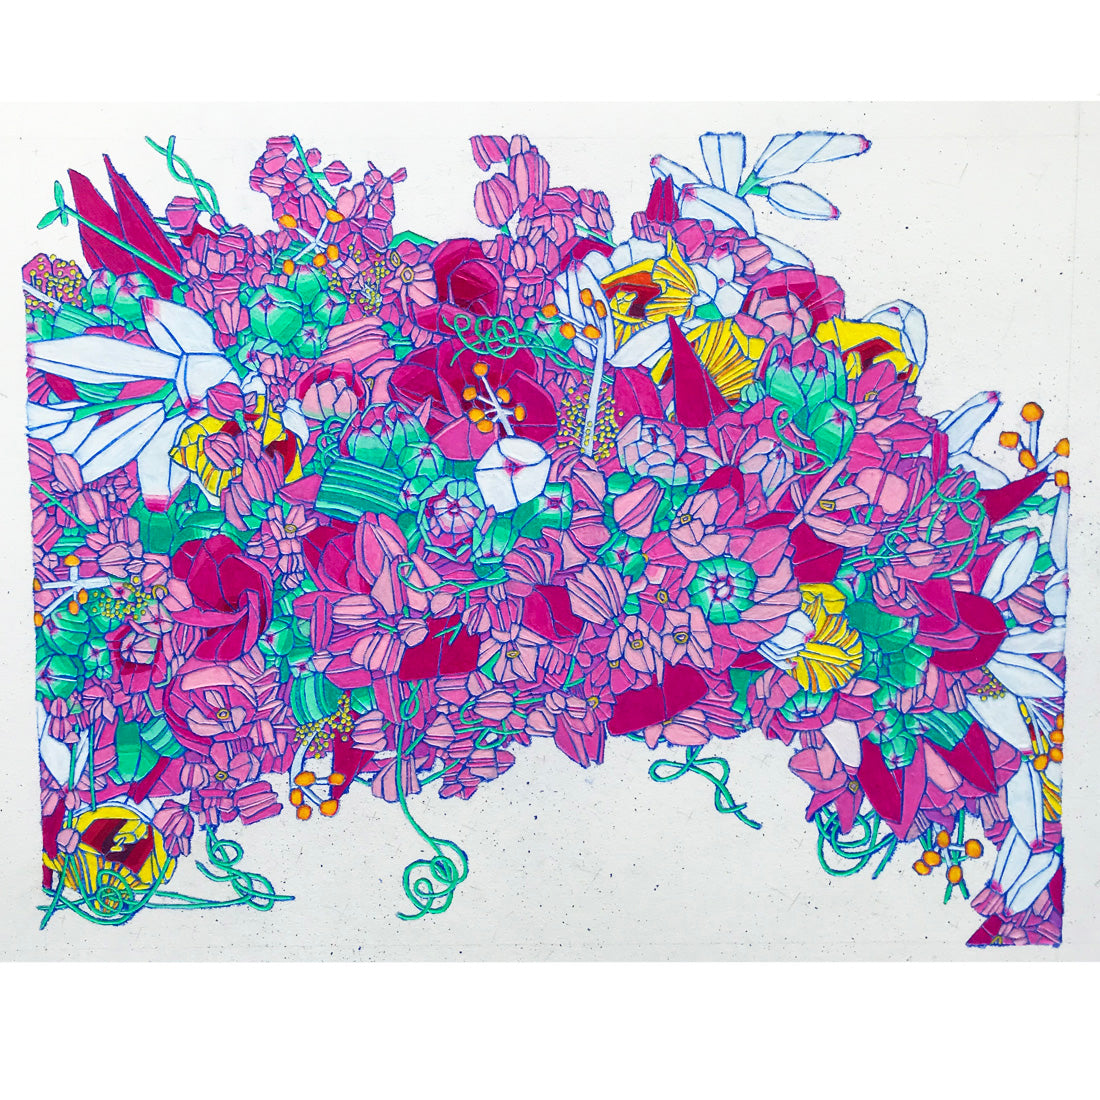
Step 6 - Putting in the top layer of color: Using the planned scheme, I finally get “down to business,” heavily applying Prismacolor colored pencils over the first base layer to block in the final hues. Pictured is the finished colored pencil drawing for “Haku with Shell Ginger.”
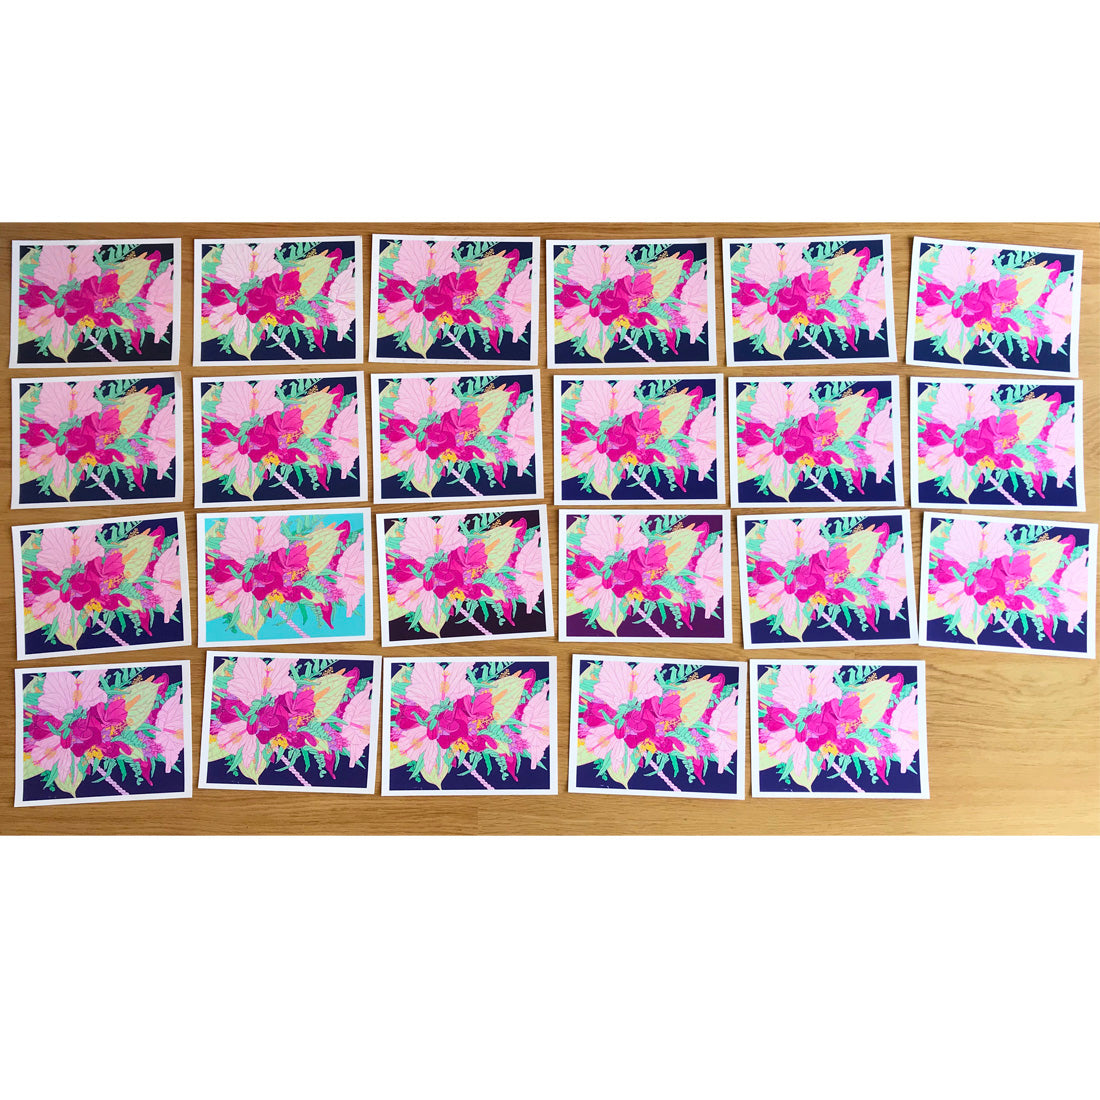
Step 7 - Digital work: This critical stage is where traditional drawing melds with modern technique. I alter and enhance the colors on screen, draw with a digital pen, adjust the composition, and choose a background. I’ll then start printing test proofs and make multiple adjustments. It generally takes about 20 test proofs to get it right. Shown are the proofs for “Haku with Hibiscus.”
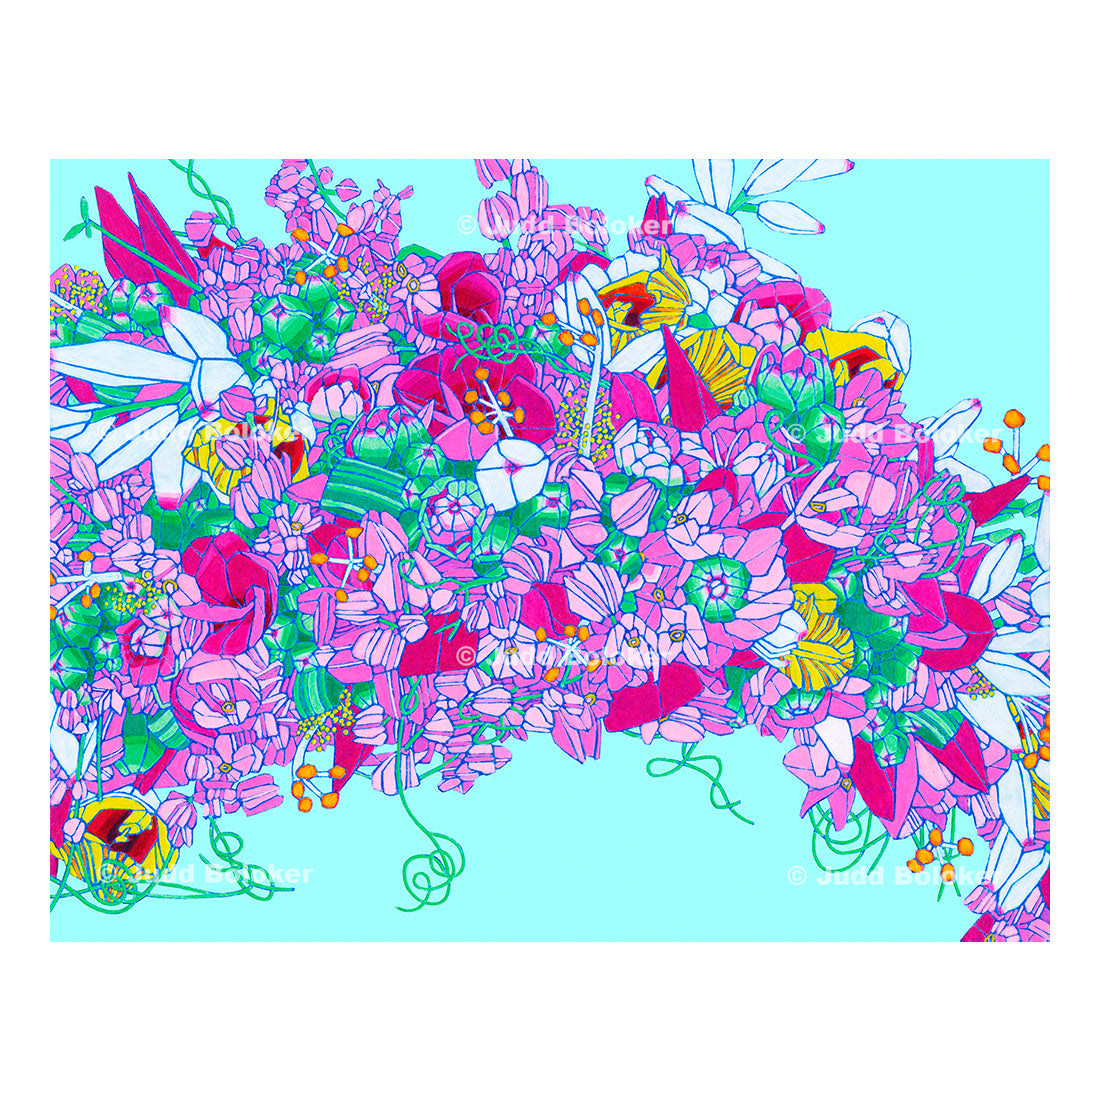
Step 8 - Final Digital Version is Approved: Pictured is the final version of “Haku with Shell Ginger.”

Step 9 - Print, Sign, Mat, and Pack . . . . . After eight to ten weeks from the start, the print is ready for your wall.